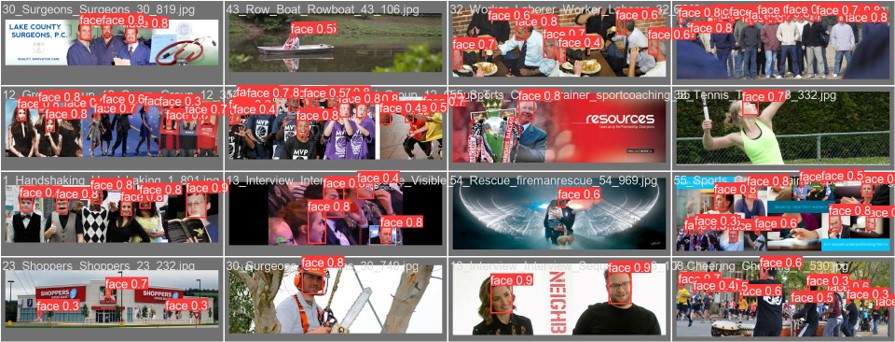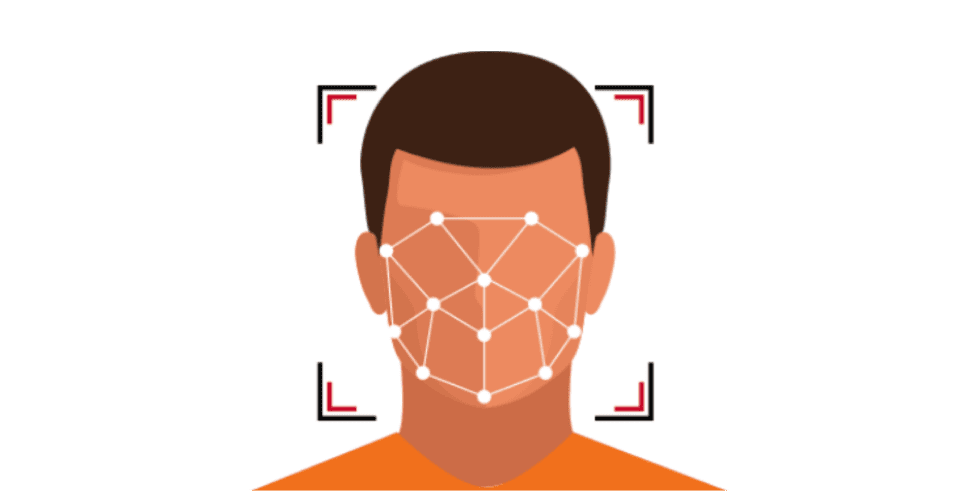
Face Detection in Large Distance
Modify YOLOv8 by integrating super resolution and transformer layer.
Code:
Face Detection in Large Distance
Install
First, we have to create an anaconda environment installed with required libraries for our porject.
conda create -n team6 -c pytorch pytorch torchvision
conda activate team6
pip install -r requirements.txt
Steps
Our project have several steps, so we separate all the code to three folders: DataProcessing, Training, Testing (We suggest not running data processing and training cuase it would take a long time)
- Data Processing:
- Construct the data structure to fulfill the YOLO requirement
- Enhance the heavy blur images in wider face dataset by using super resolution
- Training:
- We finetuned Yolov8 model for face detection.
- Train with enhanced images
- Train with transformer
- Train with both enchanced images and transformer
- Train with transformer using 100 epochs
- Train with transformer using 300 epochs
- Testing and Evaluation:
- Predicting results using all the models (6 models)
- Evaluate all the models.
Data Processing
clone the this repository
cd DataProcessing
git clone https://github.com/sczhou/CodeFormer
cd CodeFormer
Then install more libraries
pip install -r requirements.txt
python basicsr/setup.py develop
conda install -c conda-forge dlib  #(only for face detection or cropping with dlib)
- Preparing data:
Find all the heavy blur images in train and val dataset, and put them in a new folder. Which will run the process file through terminal, to download WilderFace data and prepare the data for enhancement. It takes time.
python ../wilderface.py - Run Super Resolution (It will take forever.)
python inference_codeformer.py -w 0.7 --input_path ./train_heavy_blur --bg_upsampler realesrgan --face_upsample --output_path ./train_enhanced python inference_codeformer.py -w 0.7 --input_path ./val_heavy_blur --bg_upsampler realesrgan --face_upsample --output_path ./val_enhanced - Resize the enhanced image to their original size
python ../resize.py - Prepare YOLO style files
python ../yolov7_train_face_data_preparation.pyThis will generate folders “train” “val” in the data/widerface and the widerface.yaml compress “train”,”val” folder as well as widerface.yaml to a zip file, this will be used for training.
- Prepare YOLO style enhanced files for training
python ../enhanced_widerface.pythis will copy the enhanced images to the train,val images files, compress them like the previous step, this will be used for training.
- Prepare WiderFace style WIDER_val/images with enhanced file
python ../wilderface_val_enhance.pythis will copy the enhanced val images to the WIDER_val/images, compress it for testing.
Training
# Go to Training folder
cd Training
We have two datasets in this folder for training:
| Data sets | Description |
|---|---|
| data | the original dataset of Wider Face |
| data_enhanced | the enhanced dataset of Wider Face |
The training here use our proposed architecture which add an additional transformer layer on yolov8. It will be trained using original image with 300 epochs.
# Here we can try with different options for training.
# 1. Train on original train data for 30 epochs
python train.py -option yolov8_30

# 2. Train on enhanced train data for 30 epochs
python train.py -option yolov8_30_enhanced

# 3. Train on original train data for 30 epochs with additional transformer layer
python train.py -option yolov8_30_transformer

# 4. Train on enhanced train data for 30 epochs with additional transformer layer
python train.py -option yolov8_30_transformer_enhanced

# 5. Train on original train data for 100 epochs with additional transformer layer
python train.py -option yolov8_100_transformer

# 6. Train on original train data for 300 epochs with additional transformer layer
python train.py -option yolov8_300_transformer
Testing and Evaluation
# Go to Testing folder
cd Testing
We have two validation sets in this folder for evaluation:
| Data sets | Description |
|---|---|
| WIDER_val | the original validation data of Wider Face |
| WIDER_val_enhanced | the enhanced validation data of Wider Face |
As mentioned, we have several model weights in this folder:
| Model weights | Description |
|---|---|
| yolov8_30.pt | model trained on original train data for 30 epochs |
| yolov8_30_enhanced.pt | model trained on enhanced train data for 30 epochs |
| yolov8_30_transformer.pt | model with transformer trained on original train data for 30 epochs |
| yolov8_30_transformer_enhanced.pt | model with transformer trained on enhanced train data for 30 epochs |
| yolov8_100_transformer.pt | model with transformer trained on original train data for 100 epochs |
| yolov8_300_transformer.pt | model with transformer trained on original train data for 300 epochs |
Therefore, we have 6 result folders
| Result folder | Description |
|---|---|
| yolov8_30_output | model trained on original train data for 30 epochs |
| yolov8_30_enhanced_output | model trained on enhanced train data for 30 epochs |
| yolov8_30_transformer_output | model with transformer trained on original train data for 30 epochs |
| yolov8_30_transformer_enhanced_output | model with transformer trained on enhanced train data for 30 epochs |
| yolov8_100_transformer_output | model with transformer trained on original train data for 100 epochs |
| yolov8_300_transformer_output | model with transformer trained on original train data for 300 epochs |
To test the result from pre-trained model
- Run the test.py to get output Format: python test.py -model ‘path for the weight’ -input ‘path for input images’ -output ‘output path’
#example1: testing on the yolov8_30.pt with original validation data and output to yolov8_30_output
python test.py -model yolov8_30.pt -input WIDER_val/images/ -output yolov8_30_output/

#example2: testing on the yolov8_30_enhanced with enhanced validation data and output to yolov8_30_enhanced_output/
python test.py -model yolov8_30_enhanced.pt -input WIDER_val_enhanced/images/ -output yolov8_30_enhanced_output/
- Show one result, note that it takes about 30ms for one image, exit by press any key. Format: python test_single_img.py -model ‘weight path’ -img ‘image path’
#example:
python test_single_img.py -model yolov8_30.pt -img WIDER_val/images/0--Parade/0_Parade_marchingband_1_20.jpg
To evaluate the predicted result on widerface
We use the code from https://github.com/derronqi/yolov7-face/tree/main/widerface_evaluate to evaluate the result.
#step1. Get in the widerface_evaluate folder
cd widerface_evaluate

#step2. Build the code
python setup.py build_ext --inplace

#step3. run the evaluation
# format: python3 evaluation.py -p 'predict result path' -g 'ground_truth path'

python evaluation.py -p ../widerface_result_txt -g ground_truth
Results